|
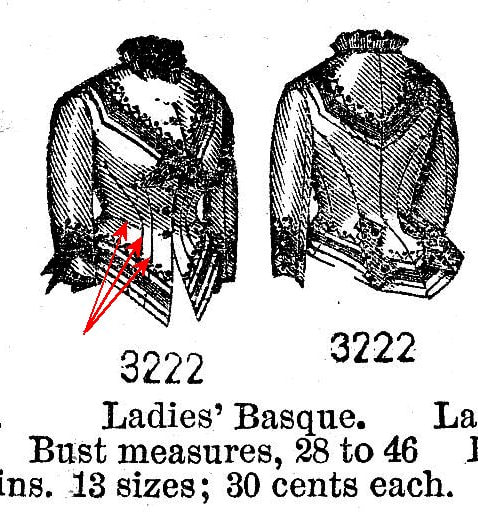
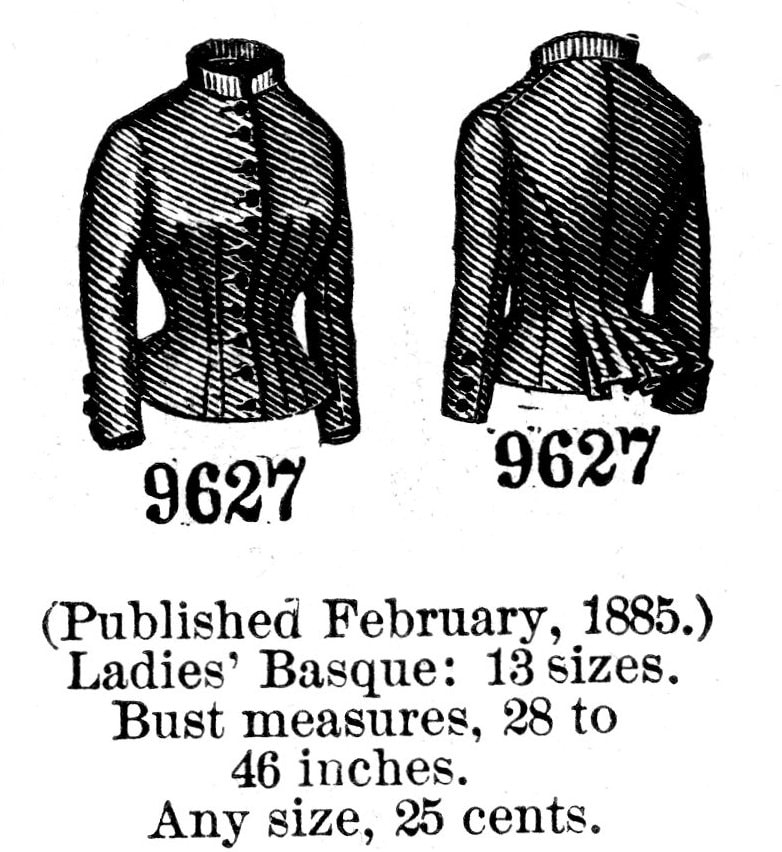
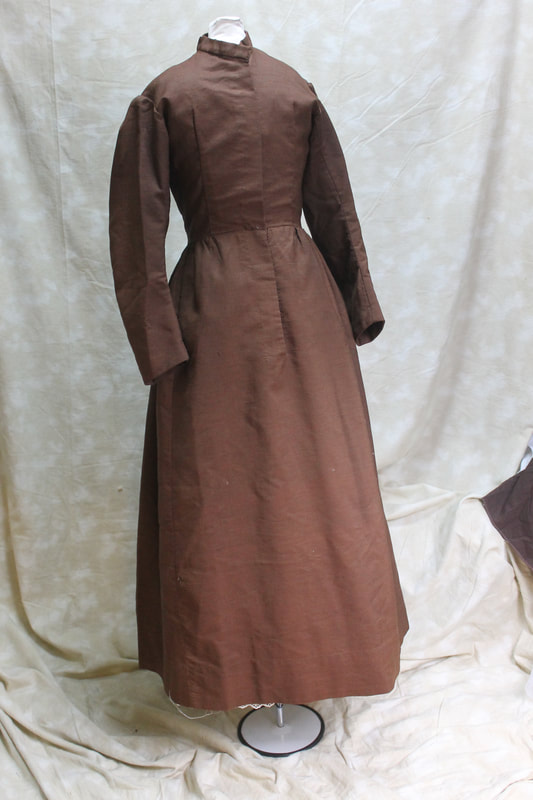
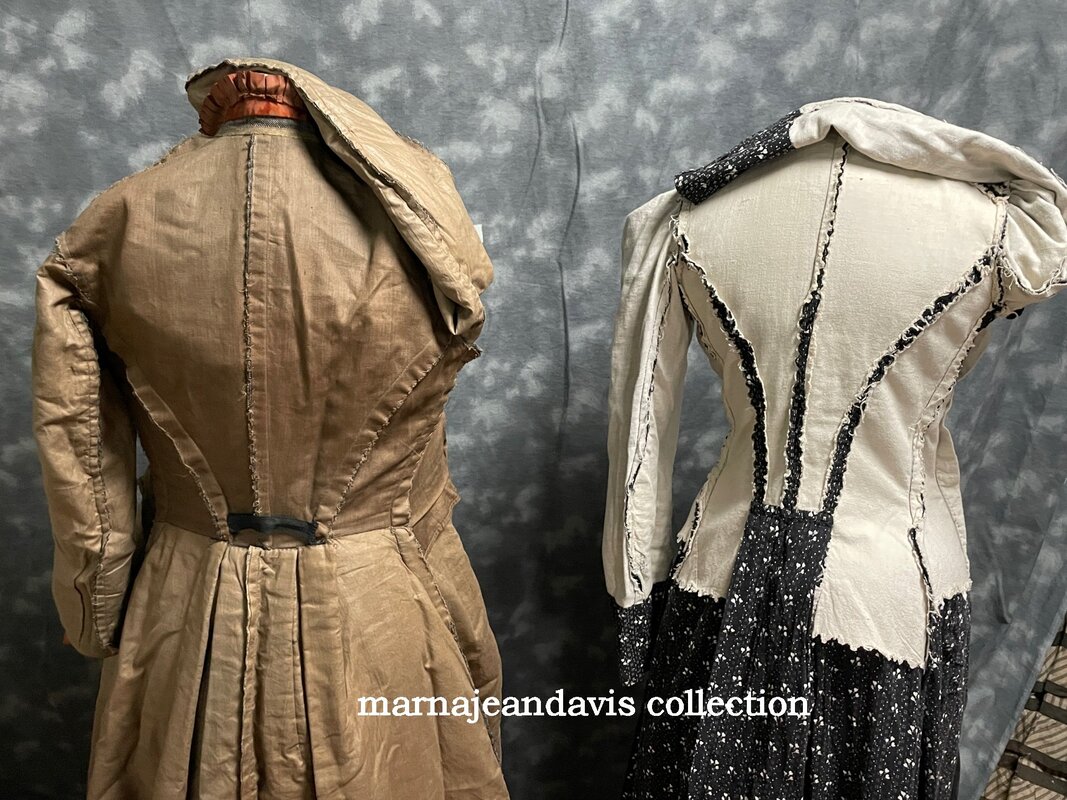
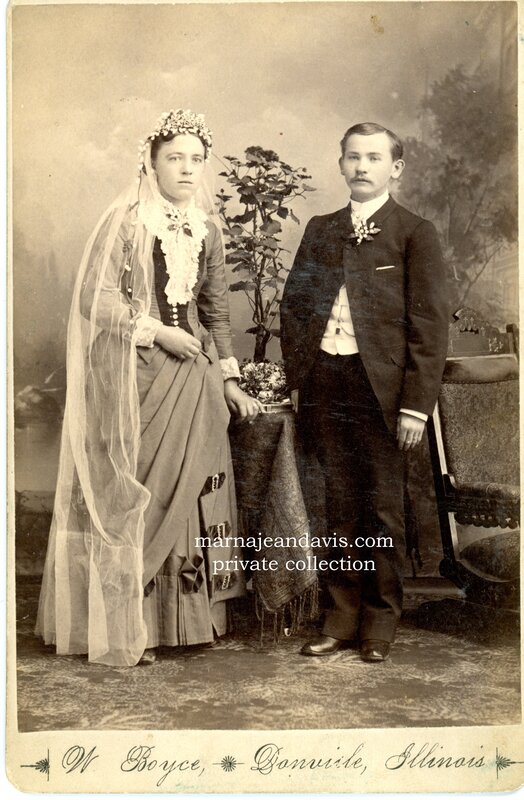
I realize not everyone has the same goals in costuming. If you are just having fun playing dress-up in pretty Victorian-esque dresses, living out alternate realities in Steampunk timelines, or just having tea with the girls, this is probably is not the blog post for you. IF HOWEVER, you are wanting to get involved in living history, or volunteer at historic sites. If you care that your kit be fairly close to what was worn "back then" this will be a VERY basic guide to things to be aware of when looking for vendors/dressmakers. This is not the be all end all, simply some hints to at least help you winnow out the chaff from the dresses that will at least be a decent starting point. What Time Period is "Late Victorian" For the purposes of this article Late Victorian is 1870 through 1900. There ARE several major changes pattern shapes will go through and when there are specifics I will attempt to point them out. I am also going to attempt to explain why some details make a difference. What to Look/Not Look ForPrincess Bodice Seams on the Front are out- Darts are in If you see a curved front seam to help fit the bust area, be EXTREMELY cautious. The greatest majority of late 19th century dresses are fitted with two vertical darts on each side of the front piece (darts extending to armscye are generally not seen on the fashion fabric layer in 19th century clothing.) There are a few bodices that only have a single dart (half-fitted) and some that are loose with no fitting darts (saques). Princess cut seams (a seam that goes from the front armscye over the bust to the waistline,) are generally only seen on 1870s princess wrappers- a dress without a waistline seam, and even then only rarely. By the 1880s the curved front seam is nearly non-existant for all practical purposes. Most bodices that appear to have a curved seam will be found most often to be an overlay, rather than a seperate seam.
Synthetic Fabrics are out- Natural Fabrics are In Stick with Natural fabrics, you may not think the casual observer can tell the difference, and perhaps they may not. HOWEVER, there are two big reasons to not use polyester, nylon and other petroleum based fabrics. 1. Fire danger - synthetic fabrics will melt and stick when they catch fire. I regularly test fabric content with flame, and have given myself some painful burns by touching the melted bead that forms when synthetics are set aflame. This melted plastic takes longer to cool down and sticks to the skin and has to be scraped away. ON the other hand, wool mostly will self extinguish and cotton, while it burns quickly can be tamped out fast with a fingertip. (cotton dress catches flames- stop, drop and roll just like they taught you in grade school!) 2. Synthetics do not "breathe" well. This means in the summer they trap body heat and persperation does not evaporate well. In the winter they offer no real insulation from the cold from their lack of ability to trap air particles. Sometimes synthetics seem cheaper, but with a bit of shopping around you can find good deals on natural fabrics. Bag Linings are Out, Flat linings are In- For the biggest part women lined their bodices. You can find a FEW extant dresses and bodices without lining previous to mid 1890s (when shirtwaists were coming in strong) BUT because of the close fit, a lining was needed to take the stress from the seams. A bodice with no lining would be fit for the rag bag at the end of a season, while you would be able to repair and keep a lined bodice wearable much longer. These linings are not what we know as bag linings now, but instead sewn as one piece with the bodice piece itself. Front facings for button closures were usually extensions of the front (most often place on selvedge edge) and folded to the inside of the bodice. Using flat linings like this made each seam go through 4 layers of fabric giving the garment more strength. SOME ladies would use linen as a lining for summer dresses (I do this myself after seeing it done on several extant pieces), and leave the sleeves unlined. For everyday dresses I have seen linings made from feed and flour sacks (plain white sometimes with printing), scraps from other dresses, and basic muslin. Nicer dresses may be lined with a glazed cotton, or a fine weight twill most often found in brown, but sometimes in black or white.
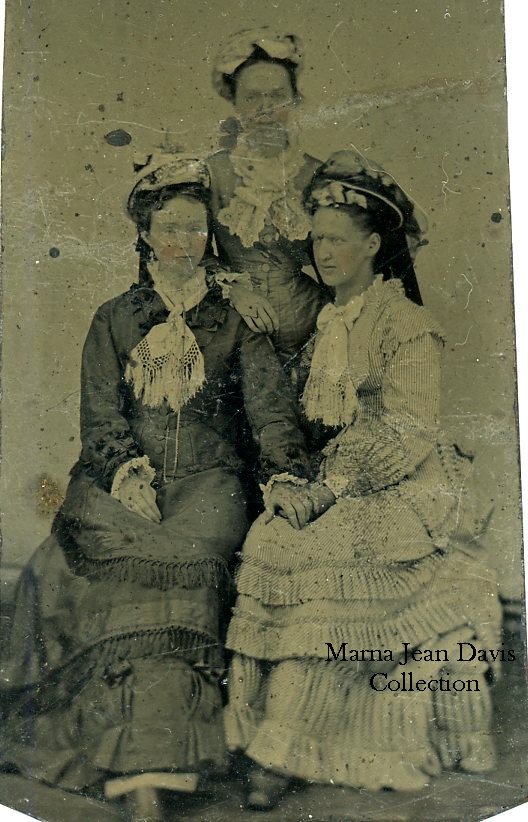
Loads of Lace is Out, Small accents of lace at Neckline is in A dress does NOT need a large amount of lace to be feminine, nor could many women afford to have lace on their gowns. A small piece at the neckline is appropriate. I have seen several dresses with hand knit lace on the collar. Use actual photos from the timeframe as your guide to applying lace, along with purchasing proper lace which is on the pricer side(not cotton cluny or polyester) and you won't go wrong. By all means avoid putting delicate lace around skirt bottoms, and save large amounts of lace for when you are portraying one of the Four Hundred
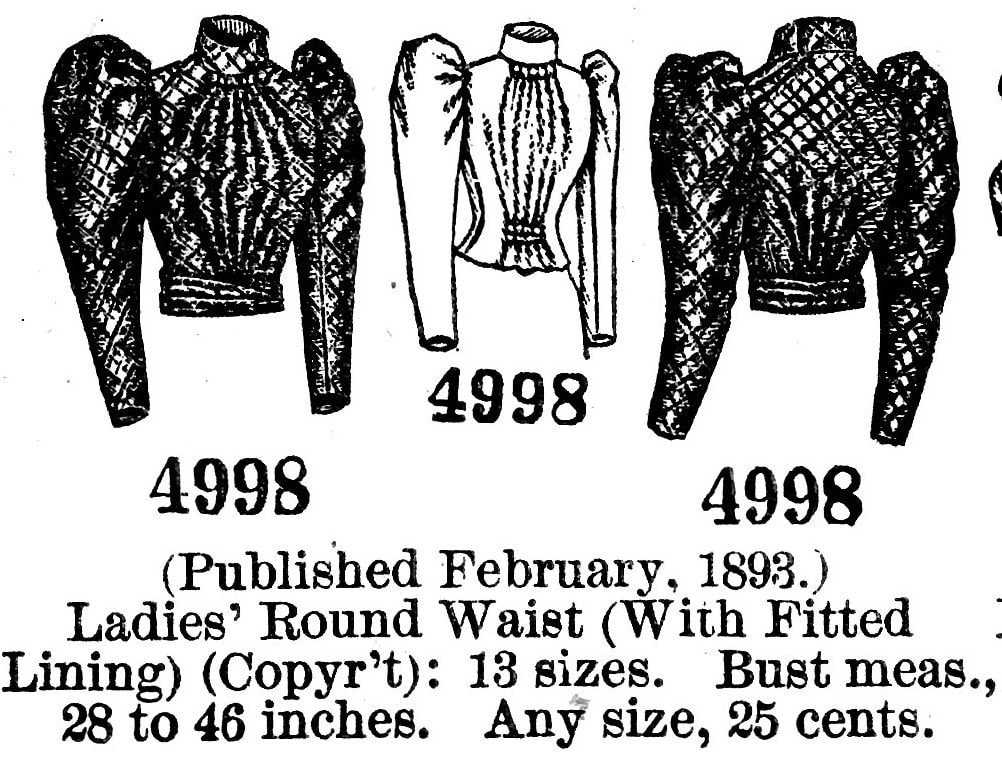
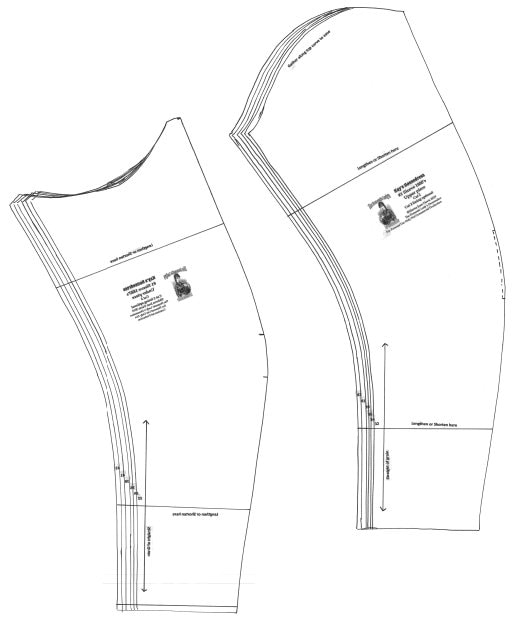
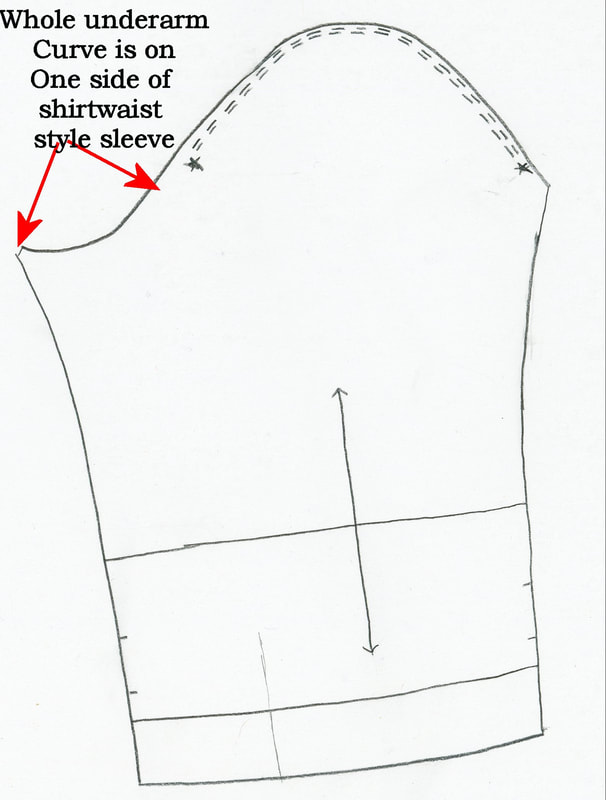
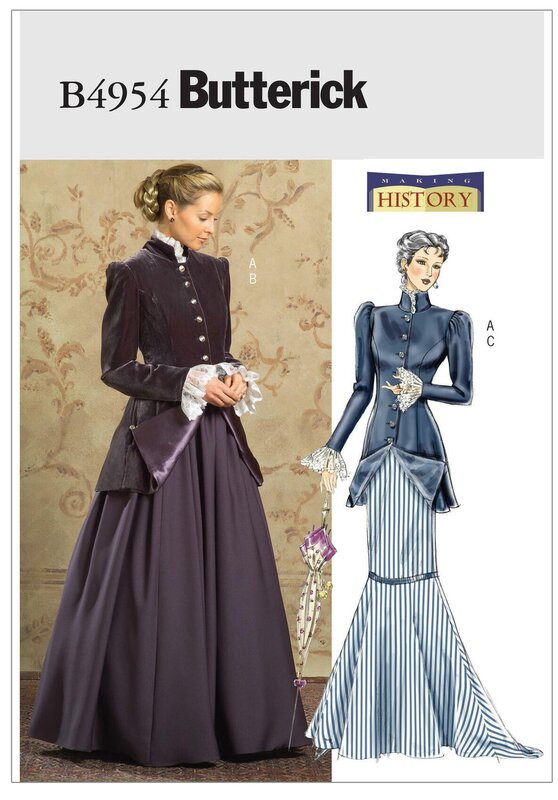
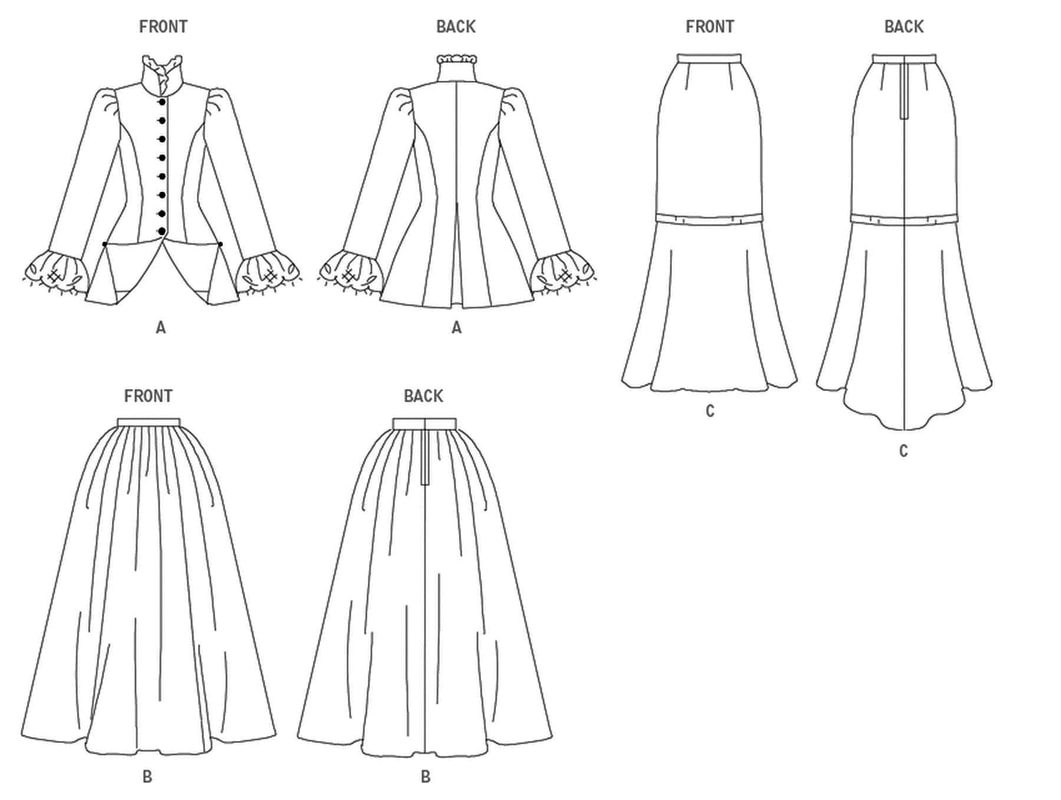
Why you should watch the length of your shoulder seam As fashion progressed from the 1860s into the 1890s the length of the shoulder seam would get progressively shorter. As it did so, the shape of the top of the sleeve head changed as well. Early 1870s dresses should have a long shoulder length, with the armscye resting just off the shoulder and above the bicep area. By the mid/late 1870s the shoulder length would be just off the shoulder line, and by the early 1880s right about the join of the arm to shoulder. By the late 1880s and early 1890s the shoulder line was growing even shorter, and by the time the sleeves were at their fullest, the armscye was now on top of the shoulder line about even if you come straight up from the armpit, so that the fullness of the arm will help hold up the leg o mutton sleeves. This is a definate change from the first time we see the leg of mutton sleeves in the 1830s when the armscye is off the shoulder line entirely. Matching correct sleeve shape/sleeve heads to correct height of armscye is really important to get a historic look and not a "costume" effect. Review of a "Big 3" pattern What is not "Historic"about it and why it is a problem if you want a historic dress This pattern is obviously just a "costume" pattern and not a historic shape. Sleeve shape- The sleeve shape is cut for a center bottom seam. This forms a tube that is most comfortable with your arms straight down, when closely fitted. On a historic sleeve the arm is naturally curved to the front in a "occupational" shape, whether it be for sewing, cooking or even shooting. Think about where your arms are positioned most of the time. Shoulder length compared to sleeve head height- The shoulder is cut too long for the height of the sleeve head. Notice on the pattern image how the sleeve head crushes in at the shouder point? IN the 1890s (and late, late 1880s) the shoulder length becomes shorter, allowing the shoulder to fill in the fullness and help support the sleeve shape. Bodice Seams There are too few seams in the back, and too many in the front. Usually the only time you see a princess seam in the front is on a wrapper in the 1870s and then it is the exception rather than the rule. A more historic fit would be achieved with 4 front darts, one on each side of the bust point on each side of the body. If this dress were attempting to be an 1880s or 1890s dress, then the likely bodice pattern pieces would give you a front with two darts, an underarm piece, a side back piece curving to the armscye and a back piece with a center seam. The lack of "extension" in the back seams will make an awkward fit over the skirt over appropriate petticoats and dress support. Skirts: Sorry these are just pretty much cut on modern shapes, and use zipper closures
2 Comments
|
AuthorPainfully obsessed clothing historian, Archives
January 2022
Categories
All
|

 RSS Feed