|
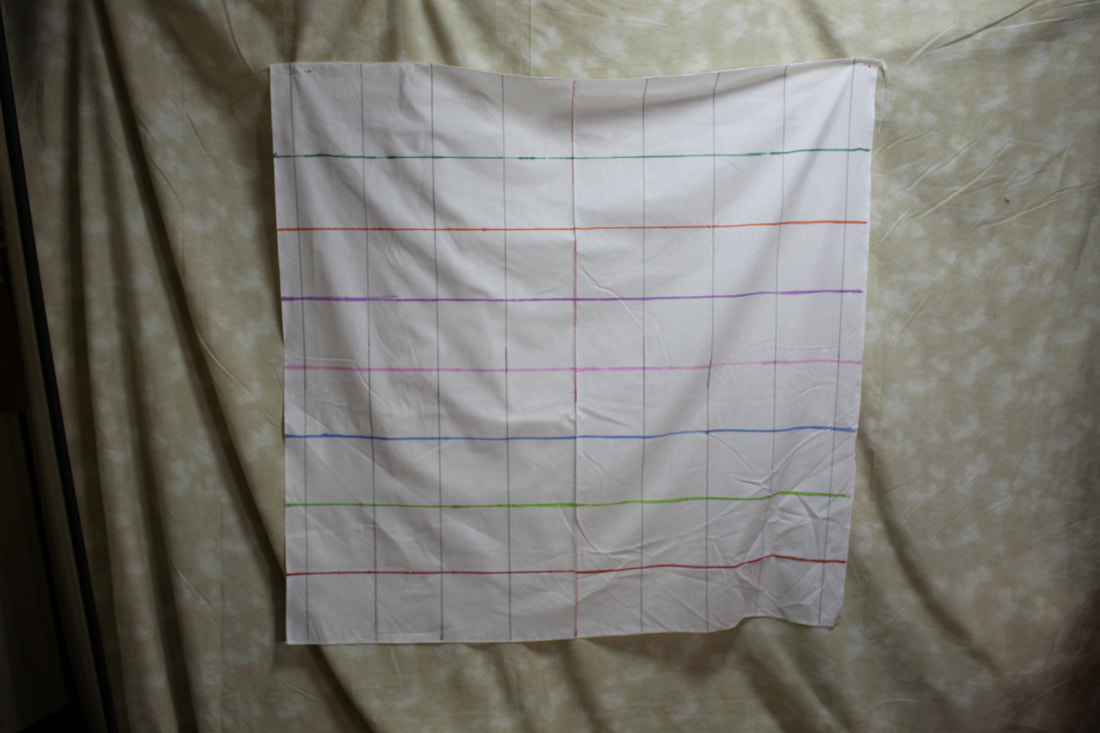
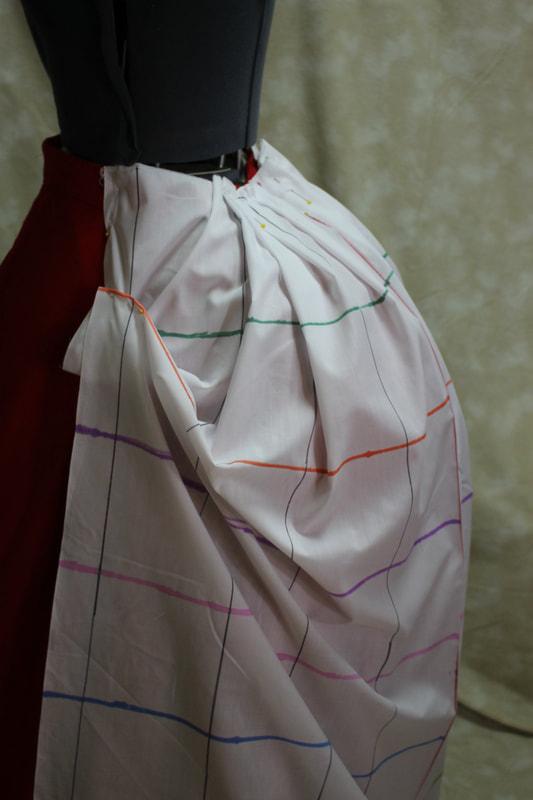
Have you ever seen a dress you wanted to reproduce, but did not have access to it in person? This post is going to help you try to read the lines of a draped overskirt to bring a bit of understanding to how draping works, and how to read a photograph to give you some starter guidelines while you are draping. 1. You HAVE to have a mannequin to do this- Or a good friend who is willing to stand while you drape. Draping involves fussing and adjusting to make sure the lines are reading like you want them.
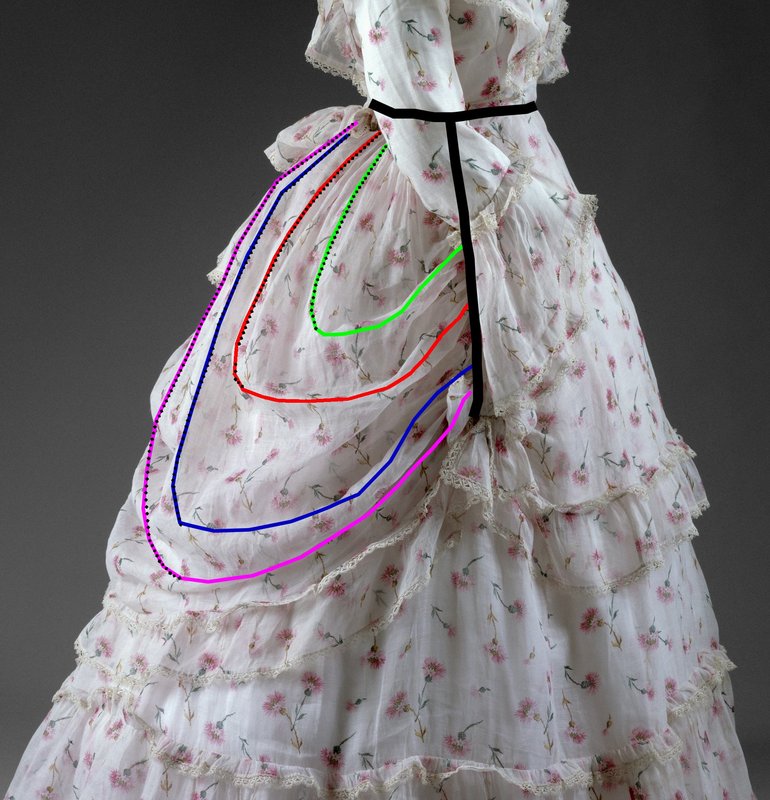
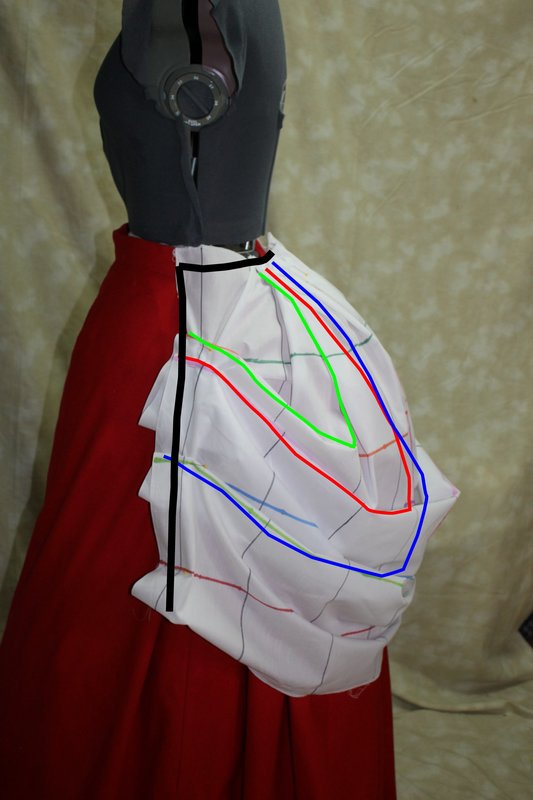
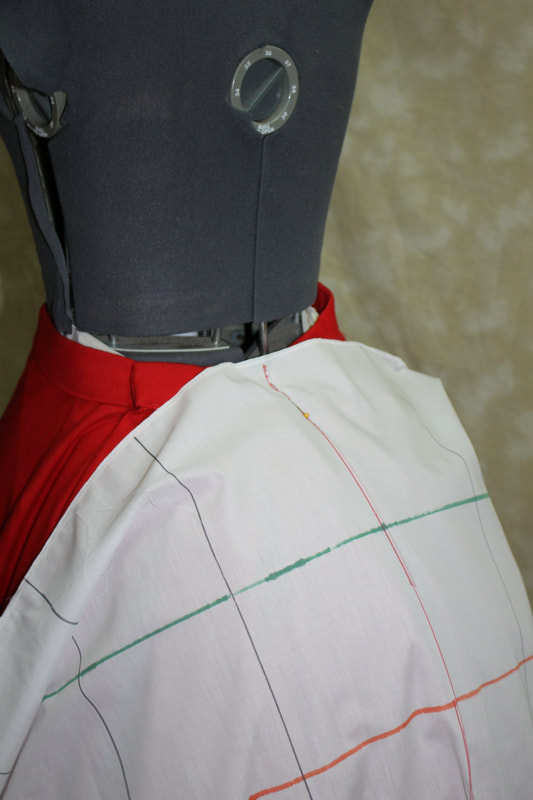
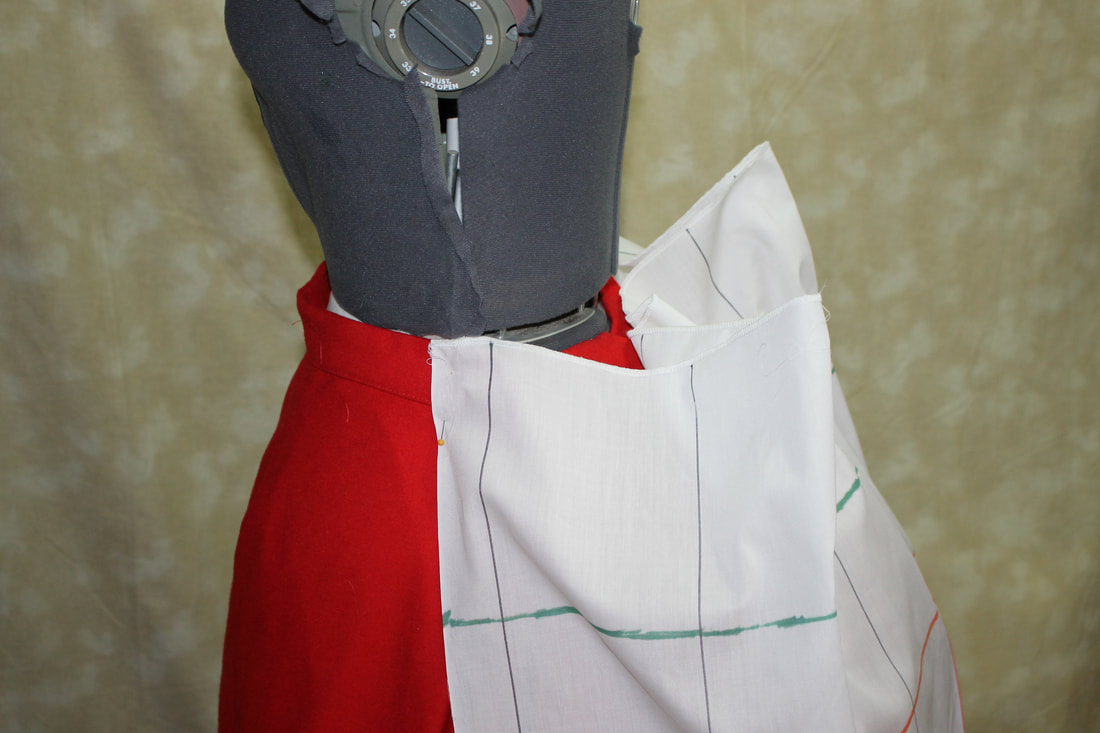
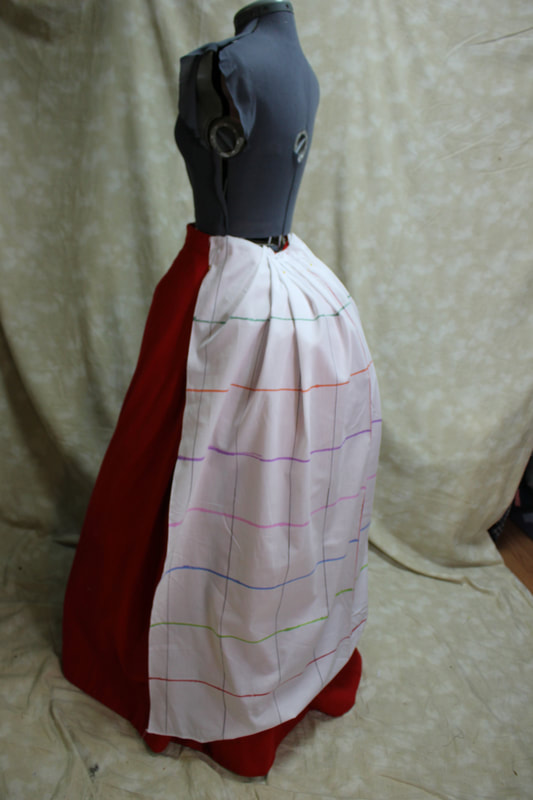
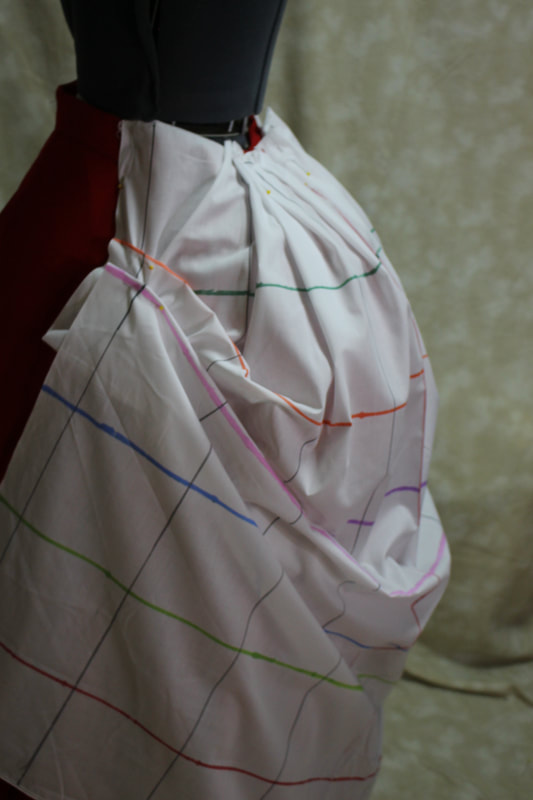
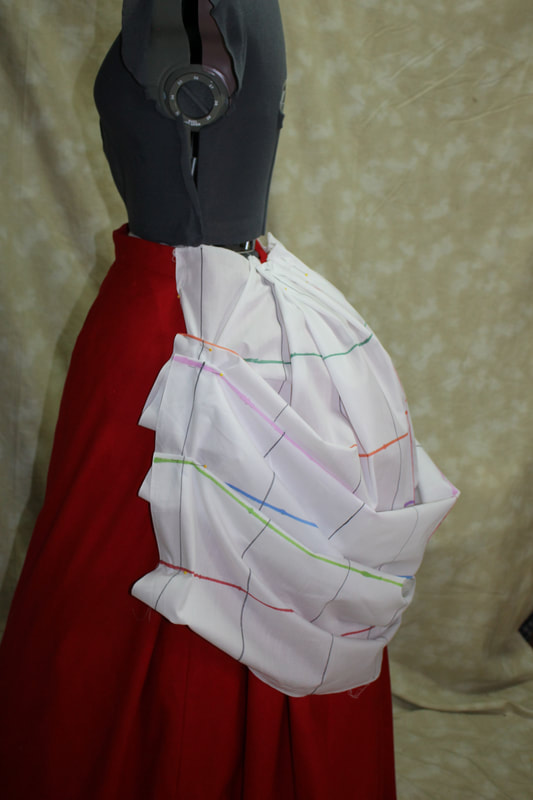
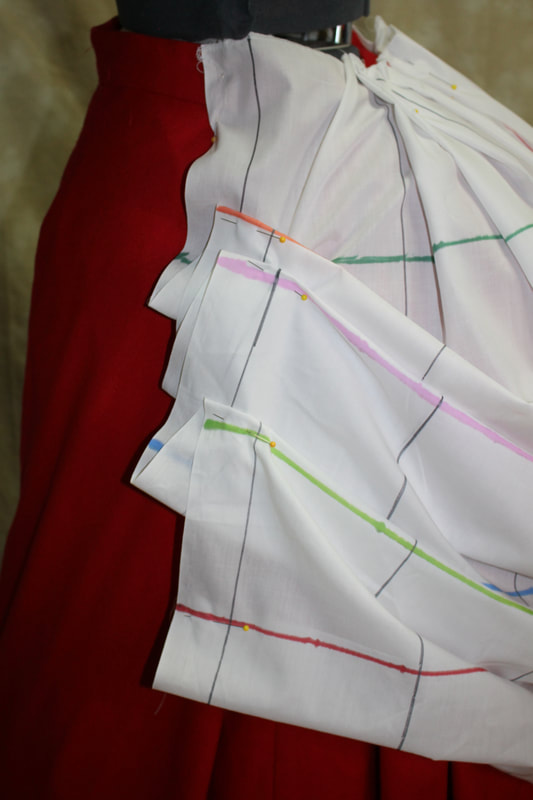
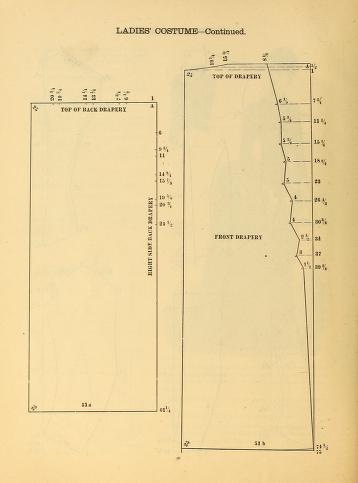
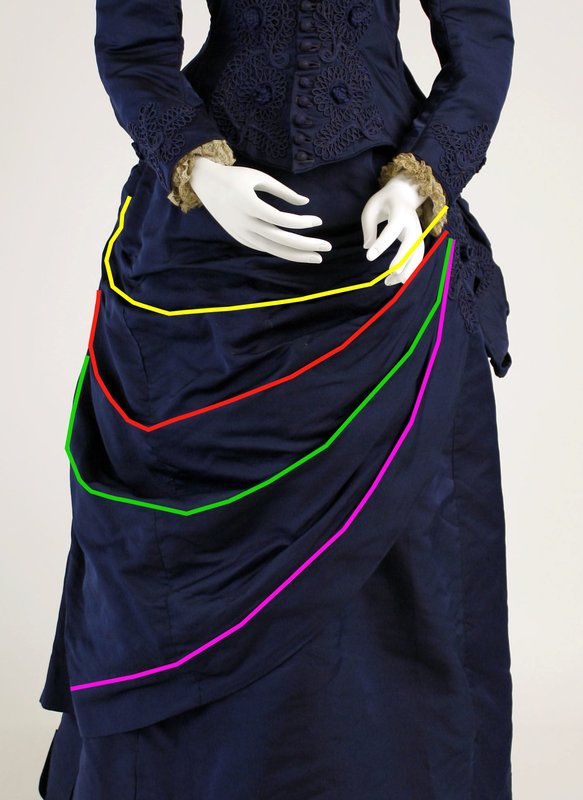
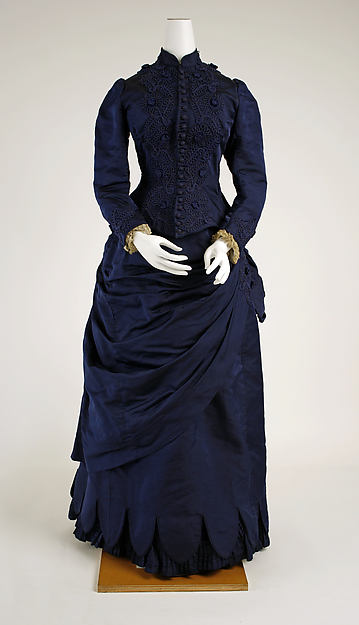
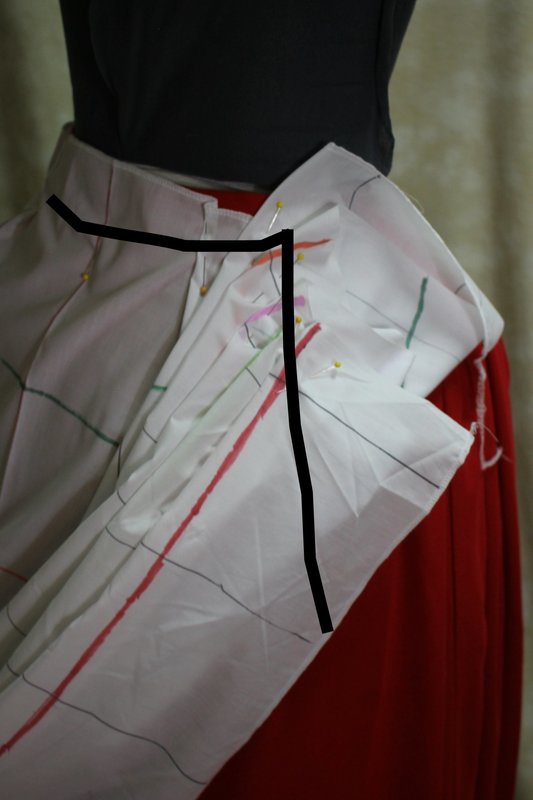
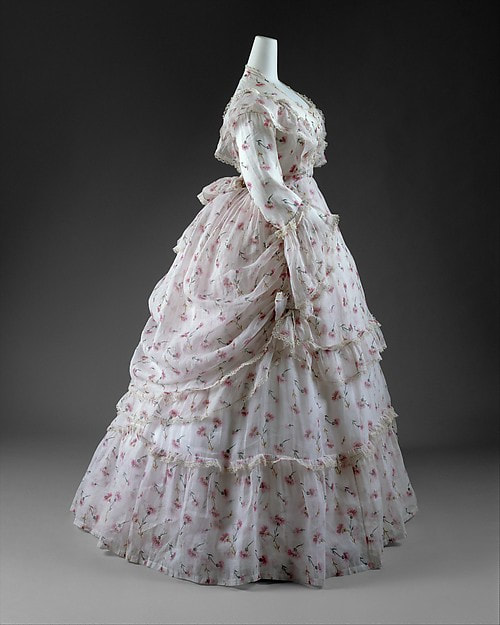 This is an early 1870's extant dress from the Met. The front overskirt is cut shaped narrower at the top, without gathers and is a flat "apron" shape. The back shape is soft and rounded and draped. Notice that it curves down and back up from side seam to side seam. It appears to be gathered along the side seam. We are going to focus on re-creating this back drape.
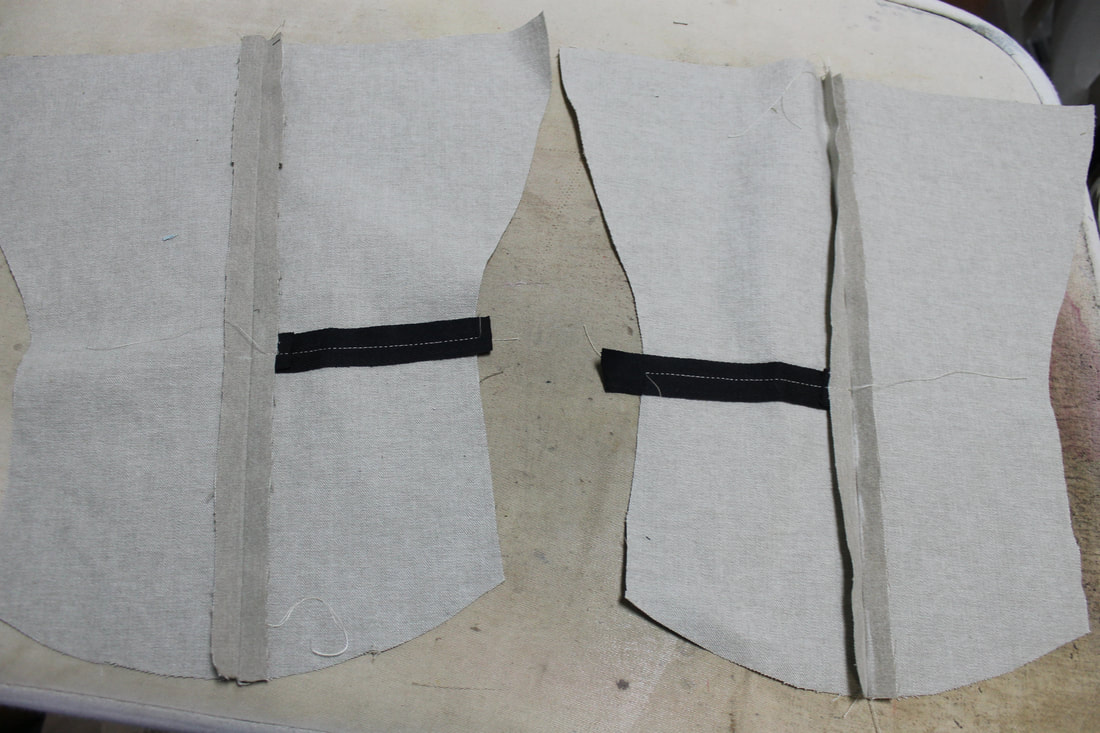
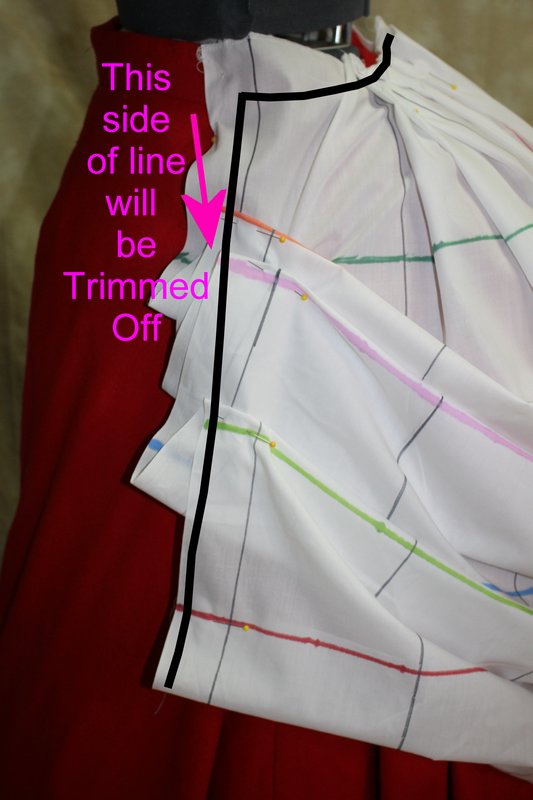
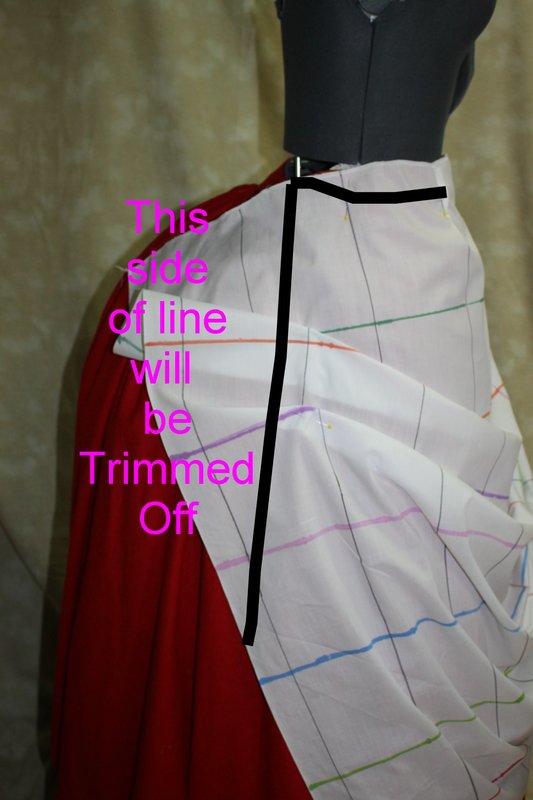
The heavy black lines on the two final photos show where the fabric is trimmed away after it is draped.
1 Comment
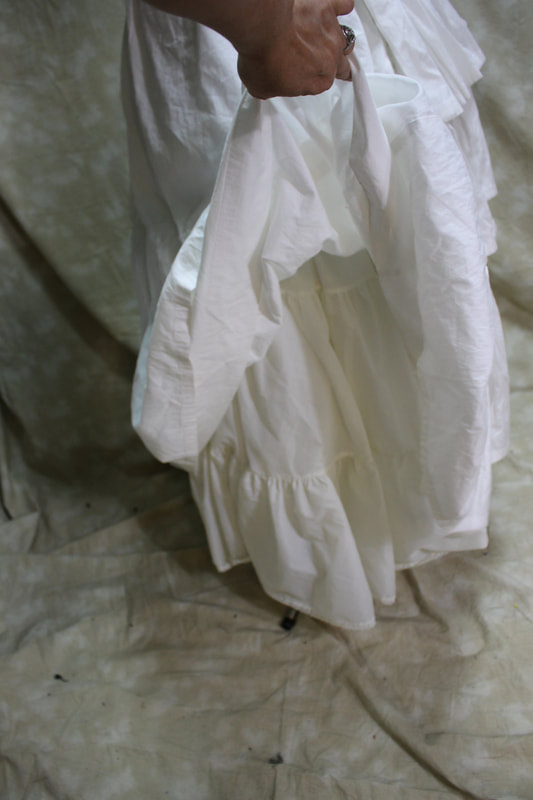
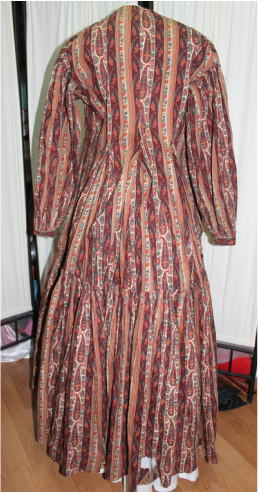 Back view extant gown Back view extant gown Research is a long drawn out process. I have been scanning fashion magazines and photos, drafting scale patterns and EVEN attempting reproduction of the fabrics on my extant gowns. I was starting to go cross-eyed and decided a bit of sewing was in order to ground me. I chose a wrapper that I had recently drafted for "Domestic Lady's Dressmaker- Volume 1". I suspect this wrapper is right around 1870-73. The shoulders are cut long so that the armscye drops off the shoulder but the shoulder seam itself runs mostly along the top of the shoulder. This particular dress is cotton, and is completely unlined. Instead of trying to make the original pattern fit me, I used my master sloper patterns from the early bustle era, put them back together as they would have been just after drafting, and redrew the lines where they would match up better to the original dress. With my new sloper pattern that I already knew would fit me in hand I proceeded to draft out the dress in a reproduction print I felt would give the same "feel" to the gown. 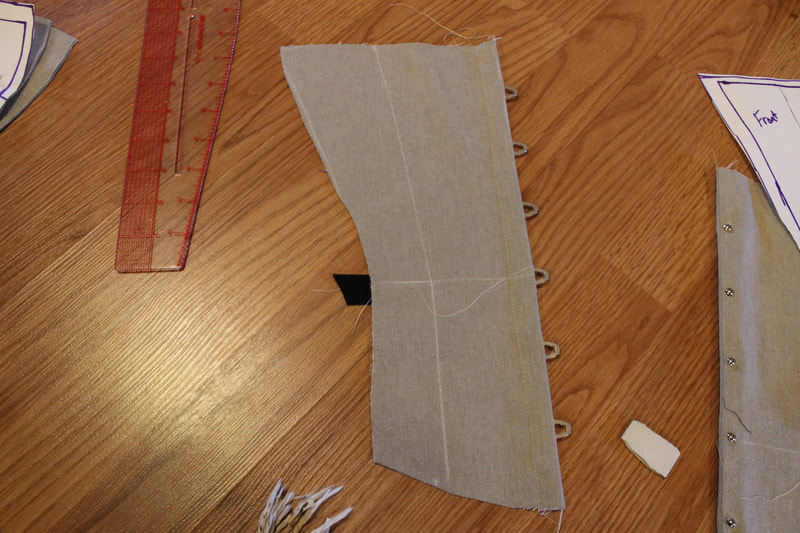 I knew this dress would make up quickly because it had no front darts, and used many speed sewing techniques that appeared with the advent of the sewing machine. No lining also helped keep the fussiness to a minimum. The hem is machine sewn, as is the bottom of the main dress. The flounce is then overlayed over the hemmed upper dress and stitched down. The sleeves are a very simple cut and gathered into a cuff and the placket for the sleeves is simply hemmed on the seam line. From cutting it out to putting it on I probably have a day's worth of work in it. I did overestimate how much longer I wanted to make it, as I have my standard dress length recorded as the heel height I usually wear for the 1880's (about 2.5 inches) and yesterday I didn't' bother to put on my shoes to try on my new gown. 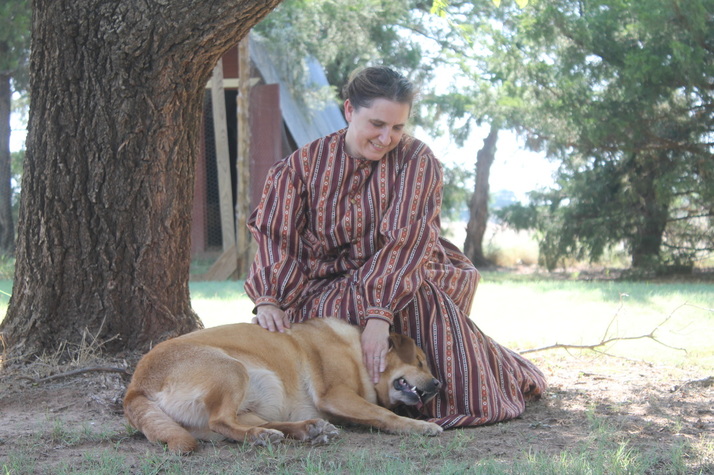 The dress is easy to move in, and I am modeling it with my corded corset, and not quite enough petticoats. (memo to self- I need new early bustle petticoats) Tara my daughter's dog decided to help me show how well I could bend over in this photo. 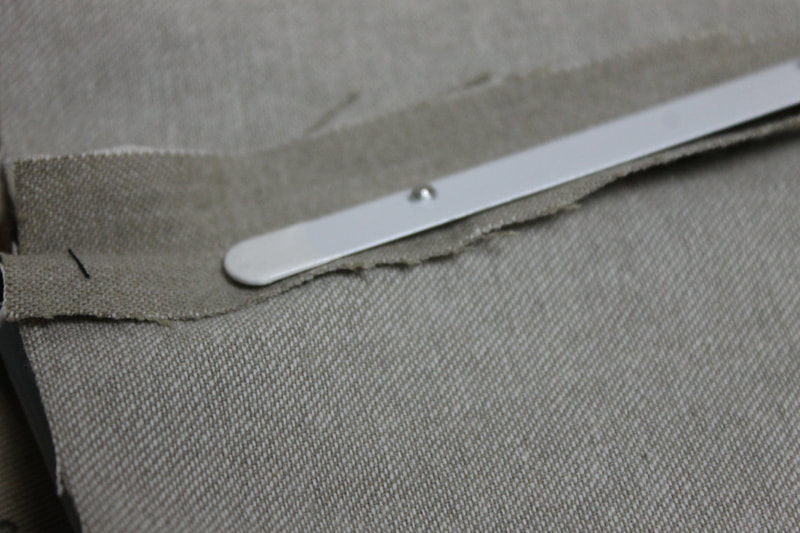 The front hangs straight down from bustpoint. Since my slopers already allowed for my full bustline, my finished dress is fairly smooth to the armscye. I chose vegetable ivory buttons from my stash to finish it off. The original had buttons placed a whopping 5 1/2 inches from center to center, and while I put mine closer than that, if I make it again I will probably go for a 3-3 1/2 inch center. The the original dress showed no sign of fasteners for the cuffs, so I chose to use matching buttons only smaller in size. Since Dear Daughter took photos for me yesterday, I have decided to also make a self fabric belt which will close with hook and eyes. I may even do one of the cute rosette sash belts with the little tabs that were so popular in that time frame. I may also later do a nice black grograin belt as well.
At any rate I think it will be a comfortable dress for housework. Now off to do a bit more research for its place in my upcoming book "Domestic Lady's Dressmaker"! |
AuthorPainfully obsessed clothing historian, Archives
January 2022
Categories
All
|


 RSS Feed